
VPC | IGW | NAT | ROUTE | RDS | Bash Scripting | ALB | Auto Scaling
Prerequisite:
- One VPC
- Two Public Subnets and One Private Subnet
- One Internet Gateway
- One Public Route
- One NAT
- One Private Route
- Create Application Instances by Auto-scaling
- One Database AWS-Server instance
- A PHP Project
Project Roadmap:
- VPC Create
- Subnet Create under the VPC
- Allow “auto-assign public subnets” two Public-Subnets
- IGW Create
- Public Route create
- NAT Create
- Private Route Create
- Database Server(RDS) Conf
- Instance Create by Auto Scaling
- Application Servers Conf and Project Deployment by User Data and Launch Template in auto-scaling
- ALB Deployment inside Auto Scaling
Step-01:
Create a VPC:-
- Select Zone
- Click on the Service
- Click on the VPC

- Click on the Your VPCs
- Click on the Create VPC button

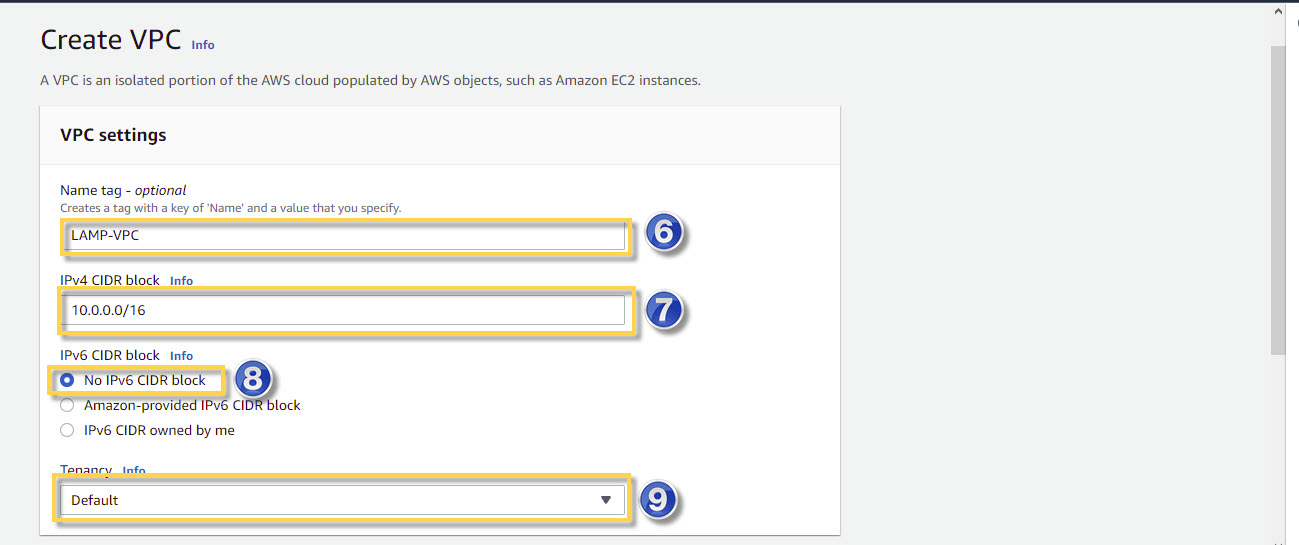
- Enter the VPC Name (LAMP-VPC)
- Enter the VPC CIDR block (CIDR Block will be (10.0.0.0/16)
- Select the No IPv6 CIDR block (as you will use IPv4)
- Select Default Tenancy info
- Then Click on the VPC Create Button
===VPC Create Done ===
VPC successfully creation is done, now need to create three subnets (Two Public for APP-Server and One Private for DB-Server) under the newly created LAM-VPC
Step-02:
Creation Three Subnets:-
- LAMP-APP-Public-Sub1 (10.0.1.0/24) Zone-1
- LAMP-APP-Public-Sub2 (10.0.2.0/24) Zone-2
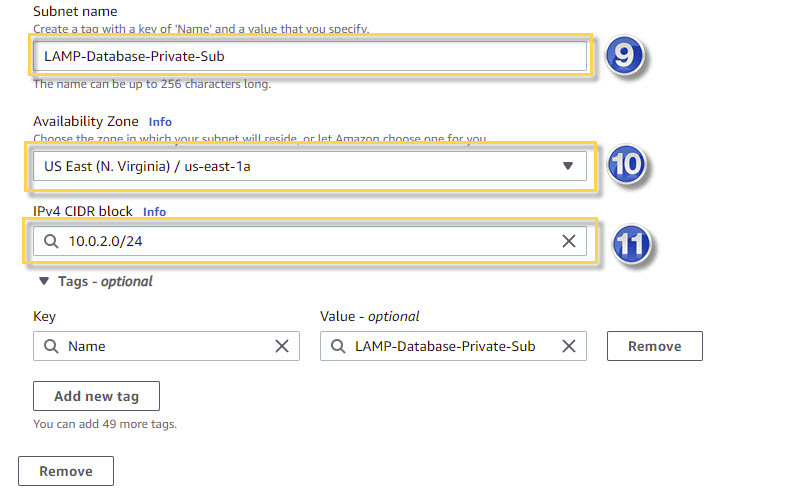
- LAMP-DB-Private-Sub1 (10.0.3.0/24)
Tow Public Subnet should be created in the tow availability zone as it’s required for ELB
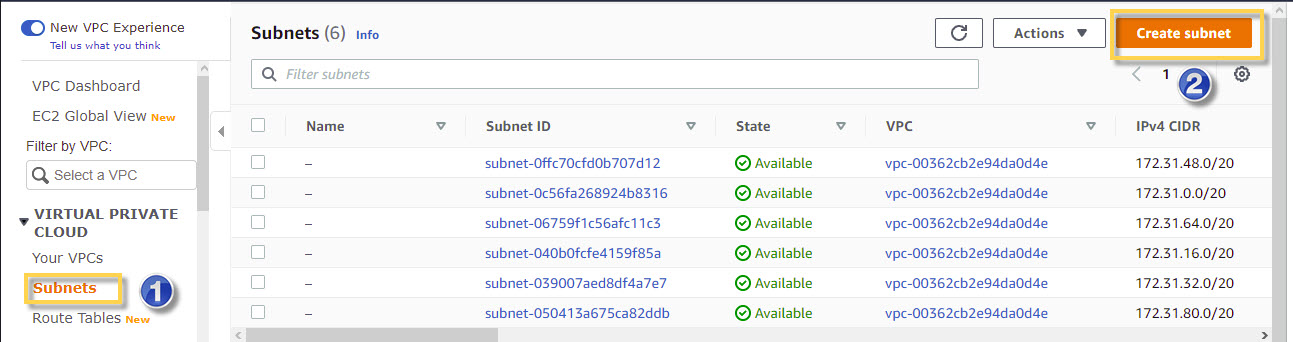
- Click on the Subnet option
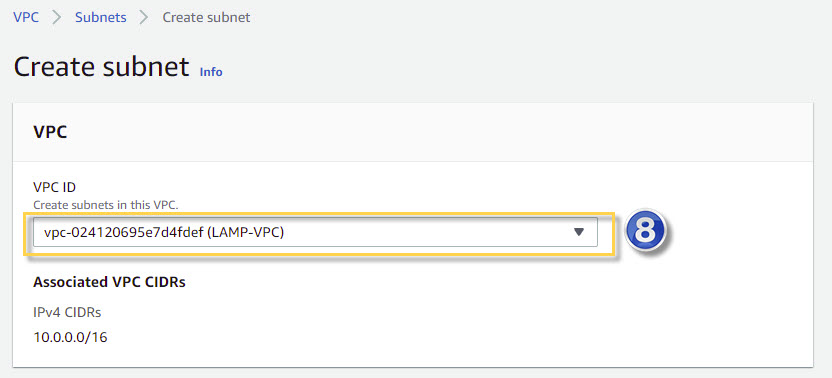
- Click on the Create Subnet Button
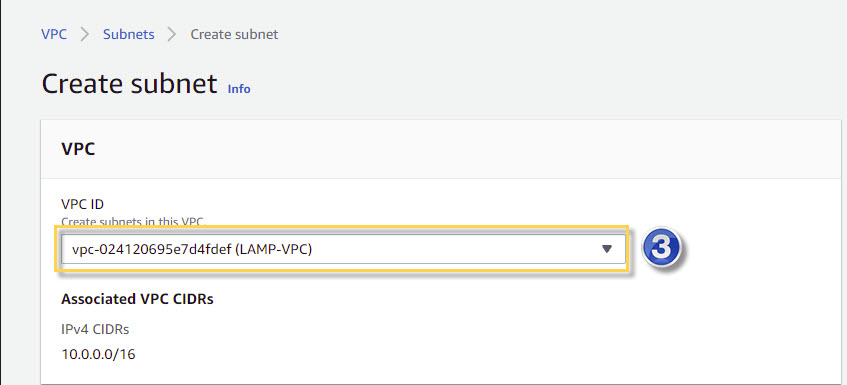
- Select/associate the newly created LAMP-VPC
Scroll down the page and follow the remaining steps
4. Enter your public subnet
5. Select Availability zone (it will be required for ELB)
6. Type CIDR Block (Assign smaller block than VPC)
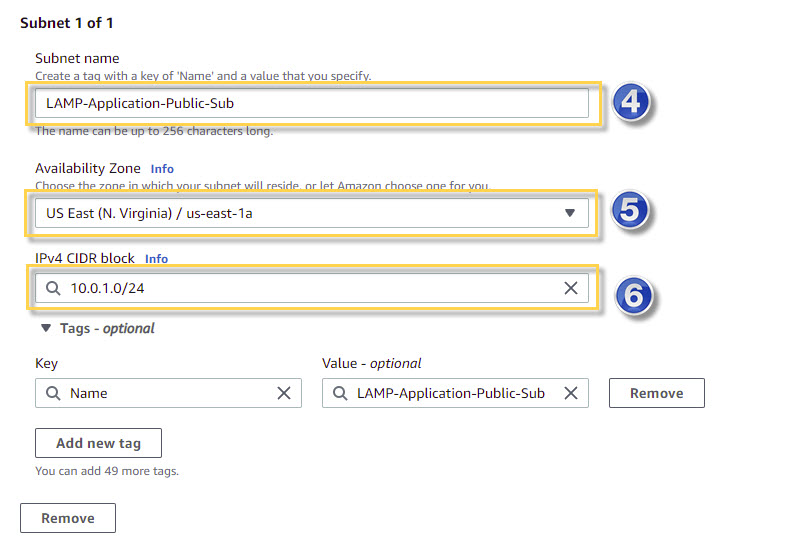
7. Click on the Create Subnet Button

Create Public Subnet-2 in the same way and select another availability zone
8. Select and Create Private Subnet-1 in the same VPC
9. Enter your private subnet
10. Select Availability zone
11. Type CICD Block
12. Click on Submit Button
After Creating Public Subnets You Have to Enable Auto-Assign-IP.
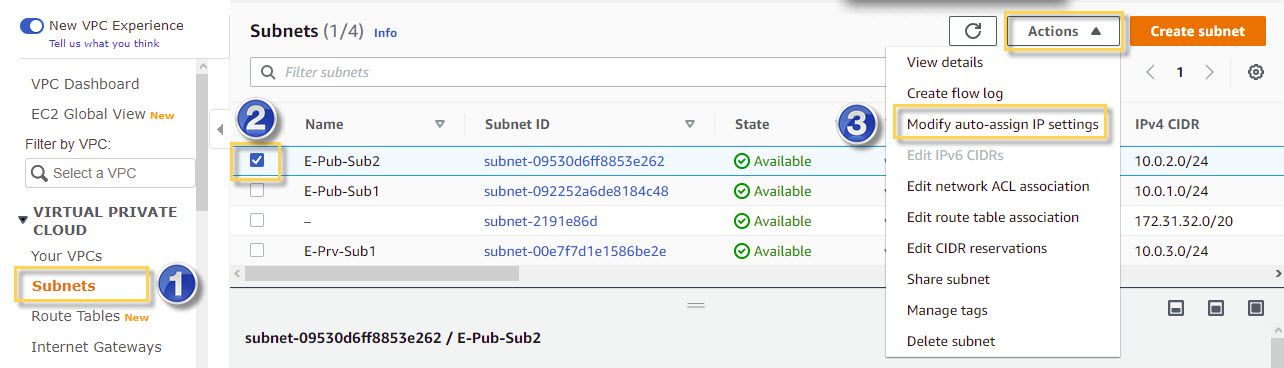
Go to Subnets interface and follow the following steps
- Select Subnets Option
- Select the Public-Subnet
- Click on the Actions button and select Modify auto-assign IP settings
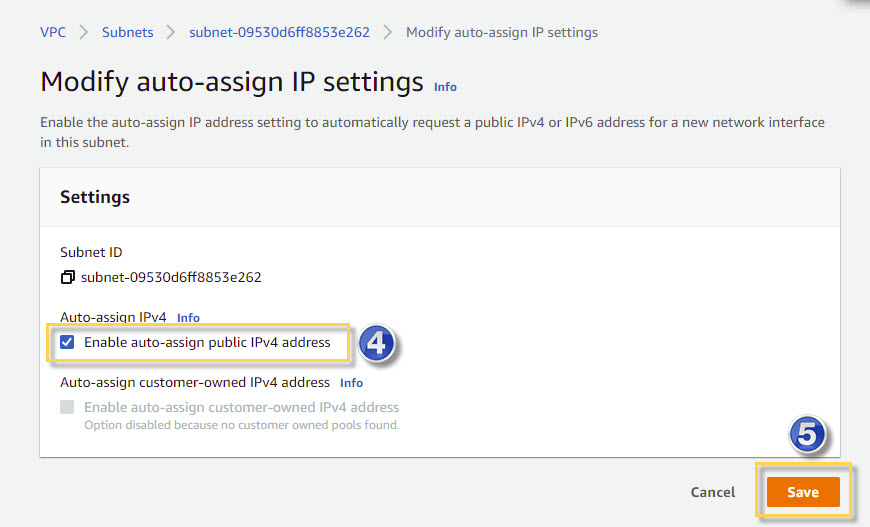
- Enable auto-assign public IPv4 address
- Click on the Save button
Note: Enable the “auto-assign public subnets” in the same way.
===Subnet Creation Done ===
Step-03:
Create IGW (Internet gateway) and attach to public Subnets:
- Click on the Internet gateways option
- Click on the Create Internet gateways button
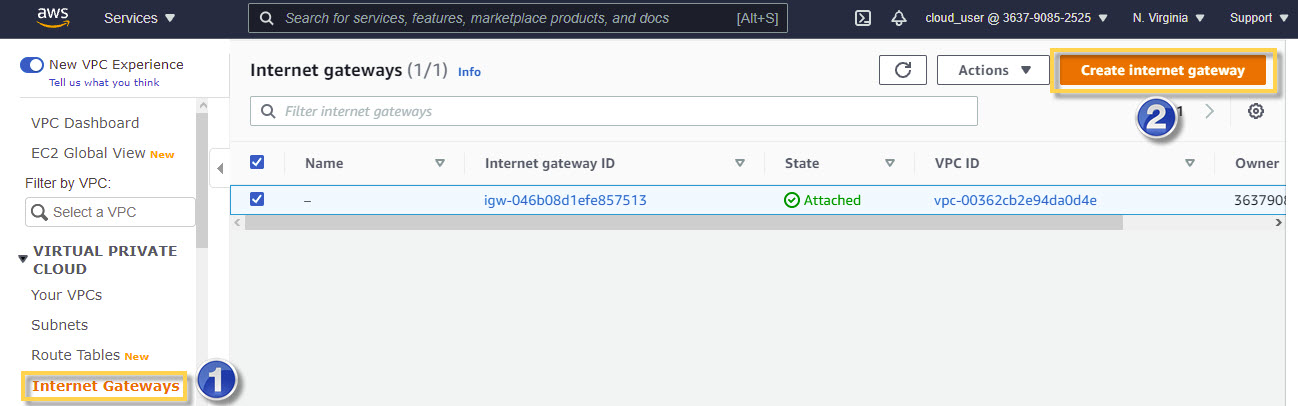
- Enter the IGW Name LAMP-IGW
- Click on the Create Internet gateways button

- Click on the Action button
- Attached to the LAMP-VPC
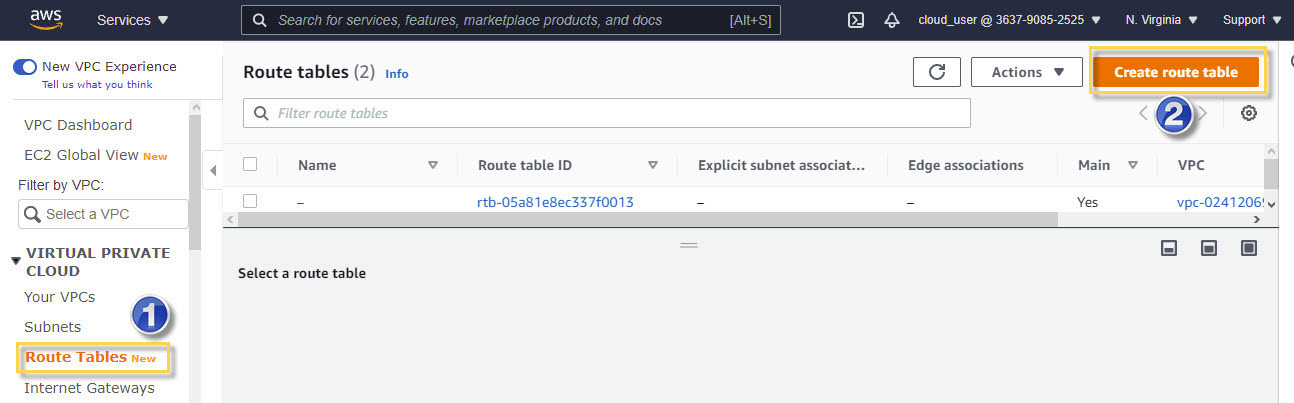
Step-04:
Create Public-Routable and Rule:
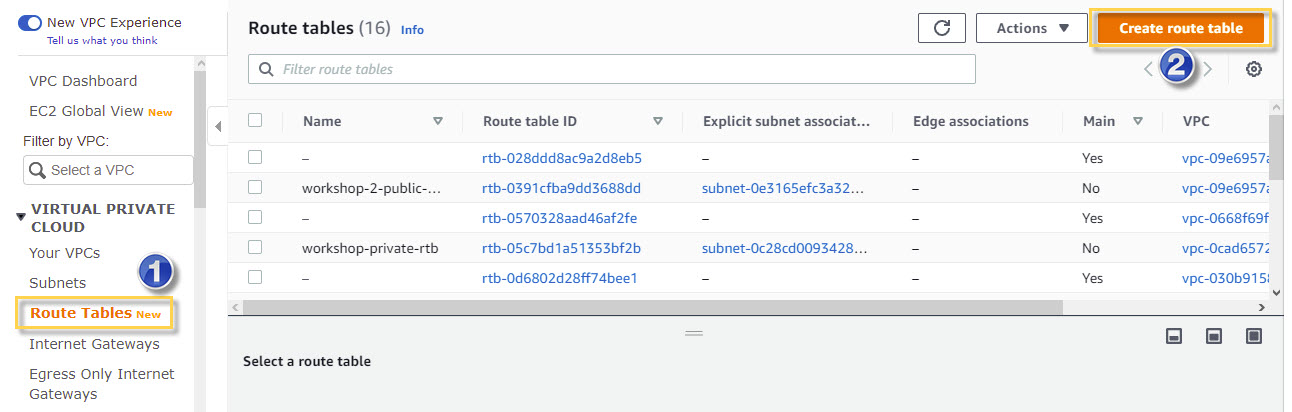
- Select the Route Tables option
- Click on the Create route table
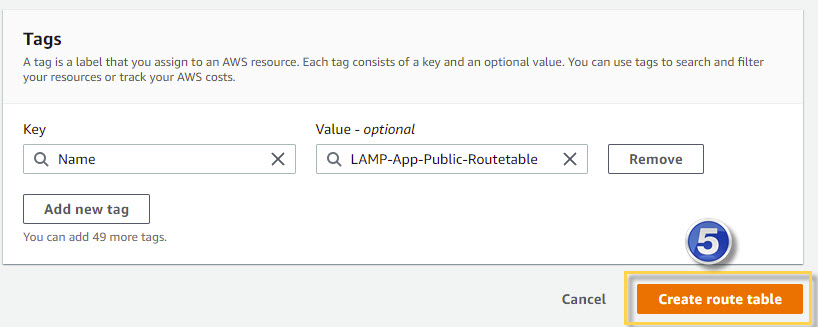
- Enter the Route table Name “LAMP-Public-Routetable”
- Select the VPC “LAMP-VPC”
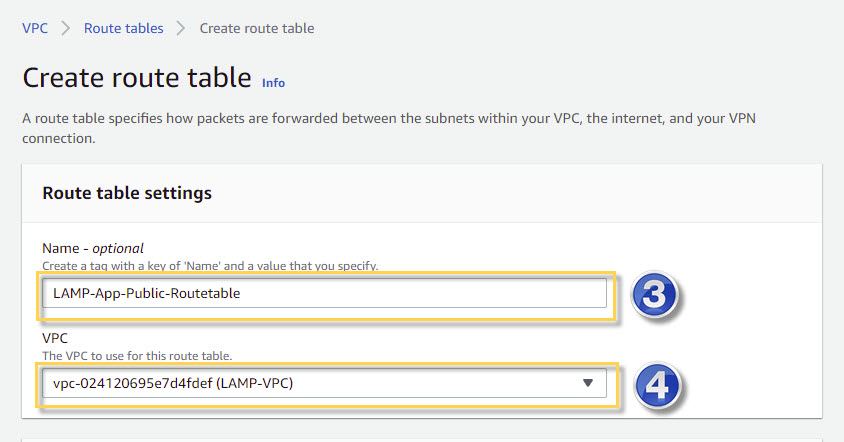
- Click on the Create route table
- Click on the Subnets Associate button from the
- Click on the Edit subnet associations button to associate “LAMP-Public-RouteTable”
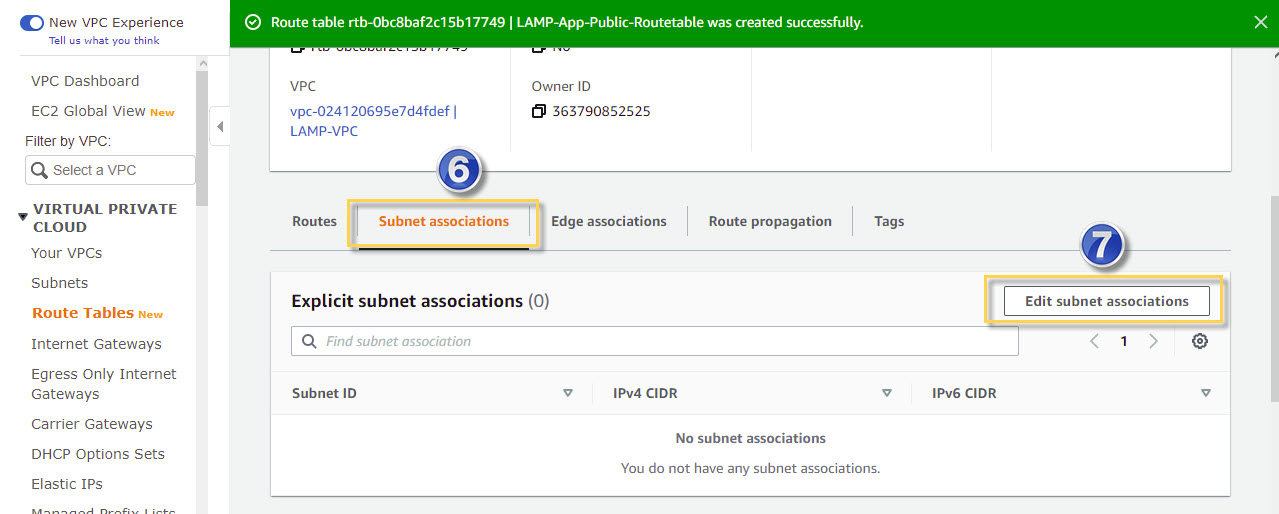
- Select the “LAMP-Application-Public-Sub”
- Click on the Save associations button

- Click on the routing interface on the same page
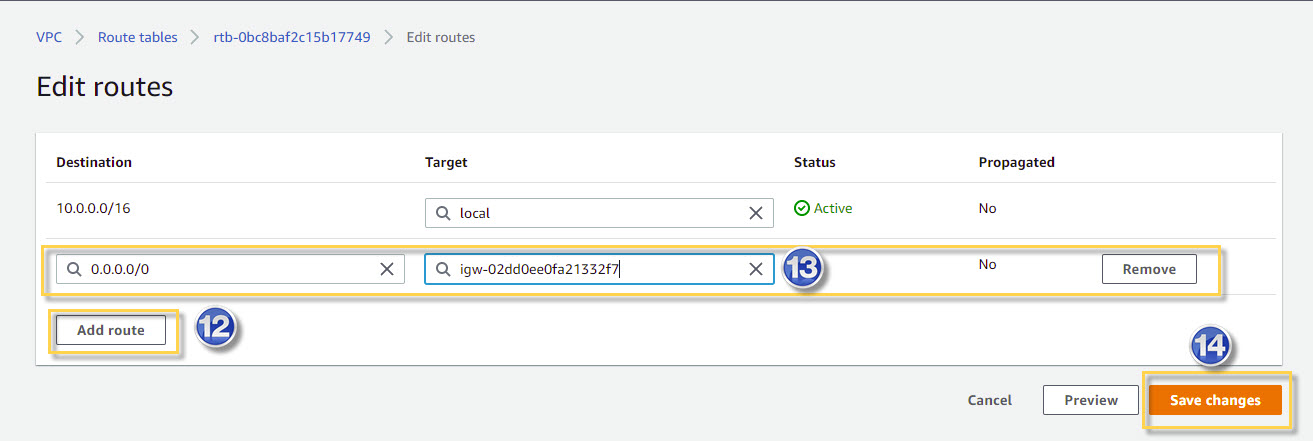
Add route rules(allow global access to anyone)
- Click on the Edit routes

- Click on the Add route button
- Add newly created “LAMP-IGW”
- Click on the Save changes
Step-05:
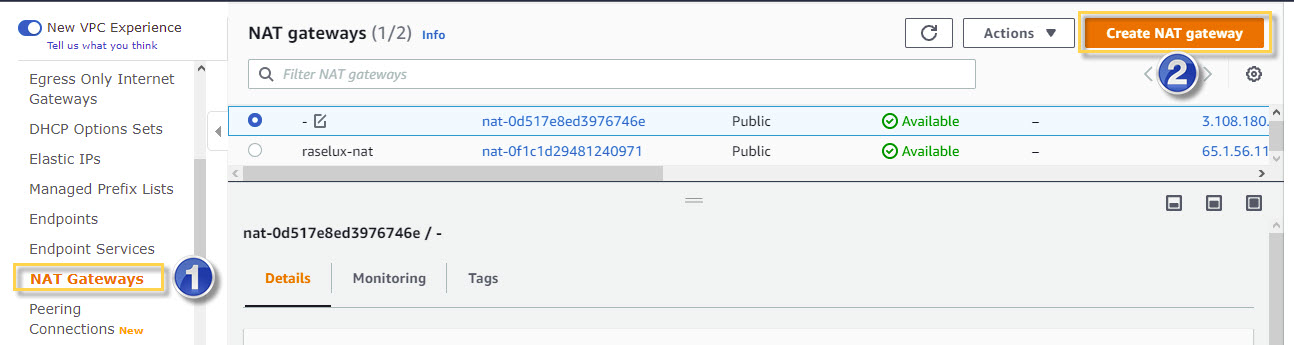
Create NAT (to get the internet connection from the LAMP-DB-Private-Sub1):
- Select the NAT Gateways option
- Click on the Create NAT gateway button
- Enter the NAT Name “LAMP-NAT”
- Select the public subnet “LAMP-APP-Public-Sub1” as the public subnet is connected to the internet and we need to get access internet for the DB prerequisite installation
- Select Public Option
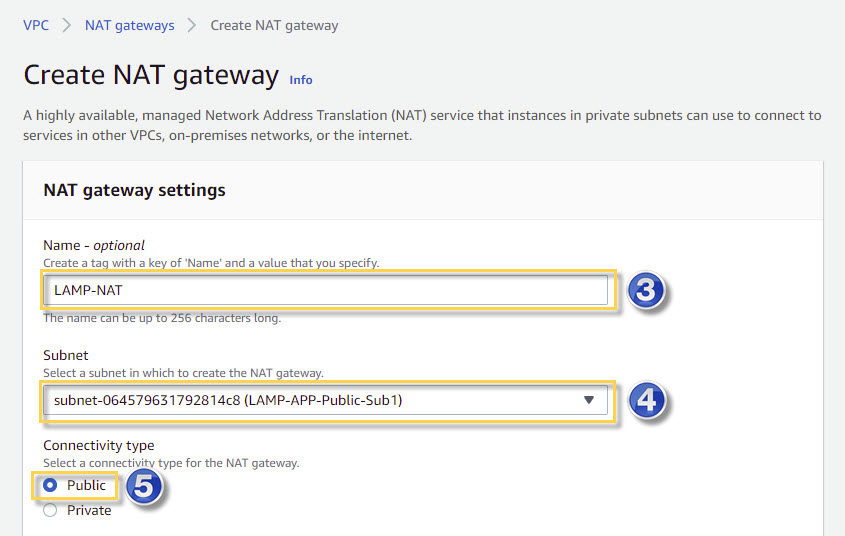
- Create an Elastic IP Clicking by Allocate Elastic IP Button
- Click on the Create NAT gateway

Step-06:
Create a Private Route Table:
- Select the Route Tables
- Click on the Create route table button
- Create with assign “LAMP-Private-RouteTable” Name
- Select the LAMP-VPC
- Click on the Create route table

- Select the newly created “LAMP-Private-RouteTable”
- Click on the Subnet Associations button
- Click on the Edit subnet associations button
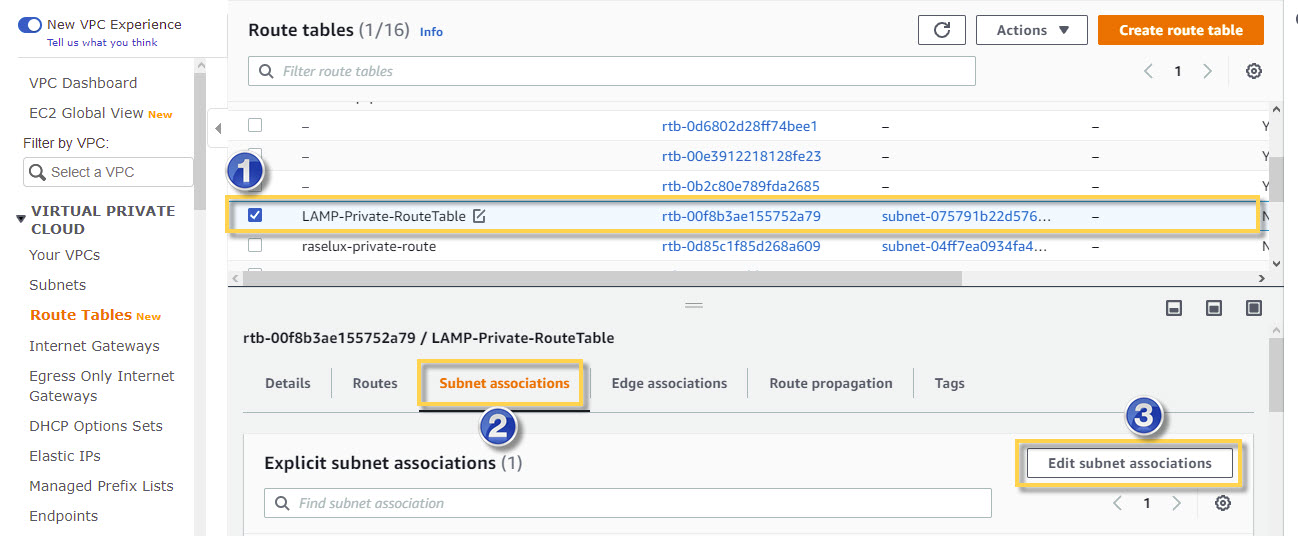
- Select the “LAMP-DB-Private-Sub1”
- Click on the Save associations Button

- Click on the Routes button
- Then click on the Edit routes
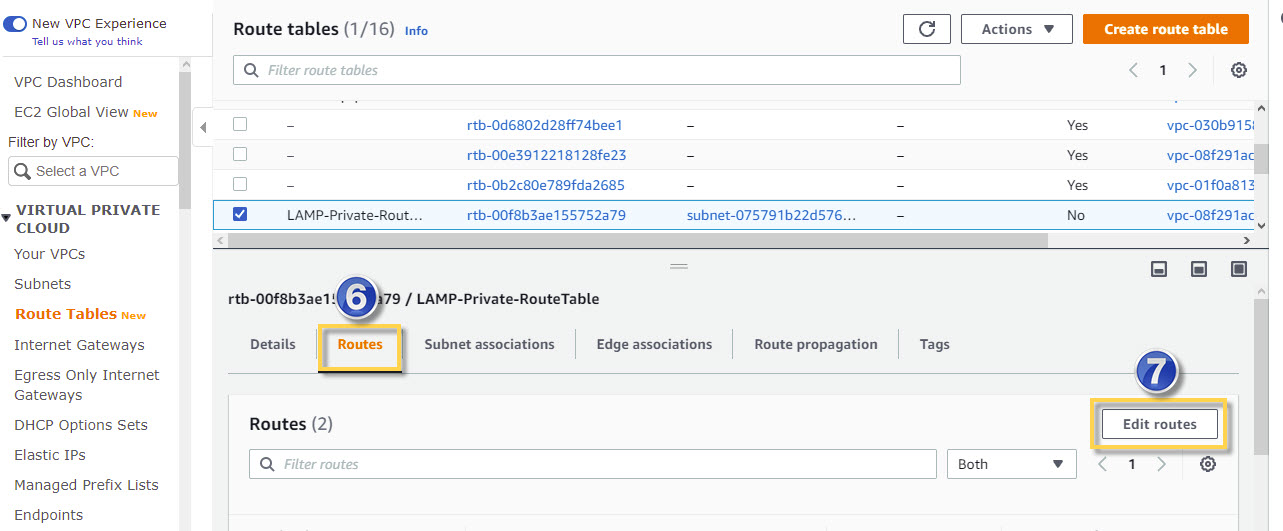
- Click on the Add route button
- Allow to any host and Select the “LAMP-NAT”
- Click on the Save Changes button

RDS
Install and Configuration
Step-7:
RDS Prepare:
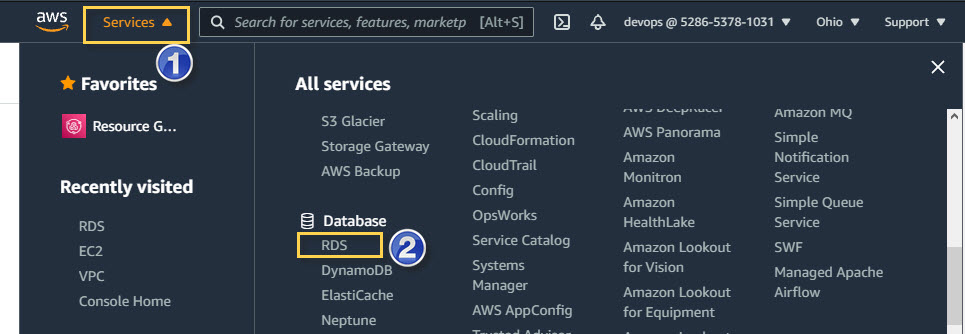
- Select Service
- Click on the RDS
- Click on the Create database

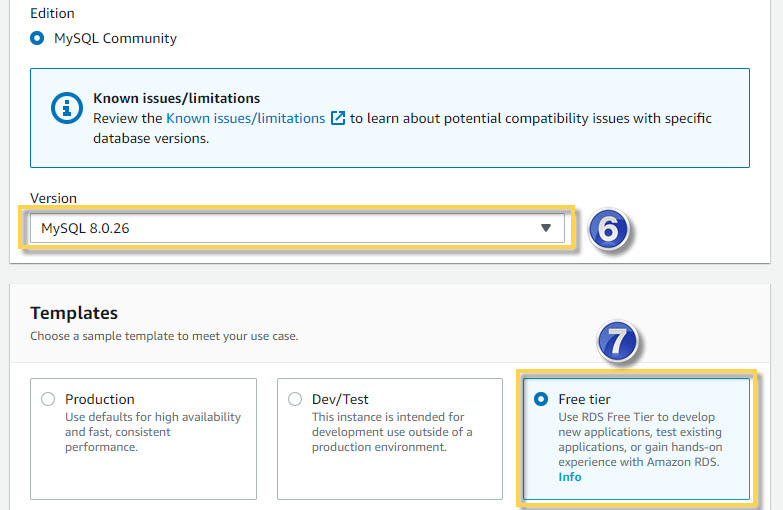
- Select the standard create
- Select the MySQL

- Select DB-Version
- Select the templates as per your requirement
- Assign the DB instance identifier name
- Assign the Database muster username

- Assign the master user password
- Select the instance DB Configuration

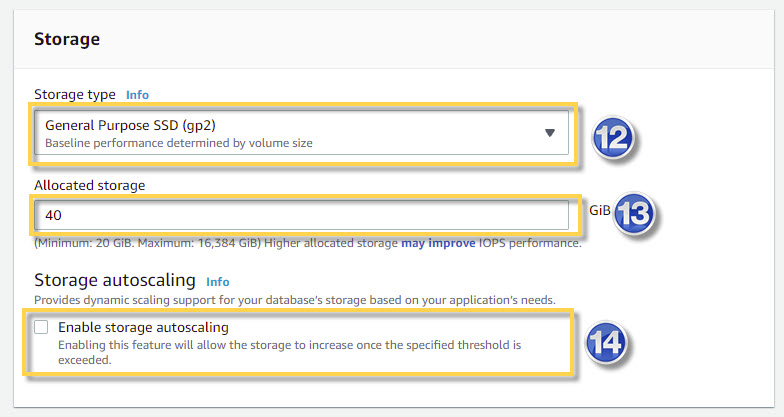
- Select the storage
- Allocate the storage capacity (minimum size 20GB)
- No need to Enable auto-scaling storage as we prepare it for practice purpose
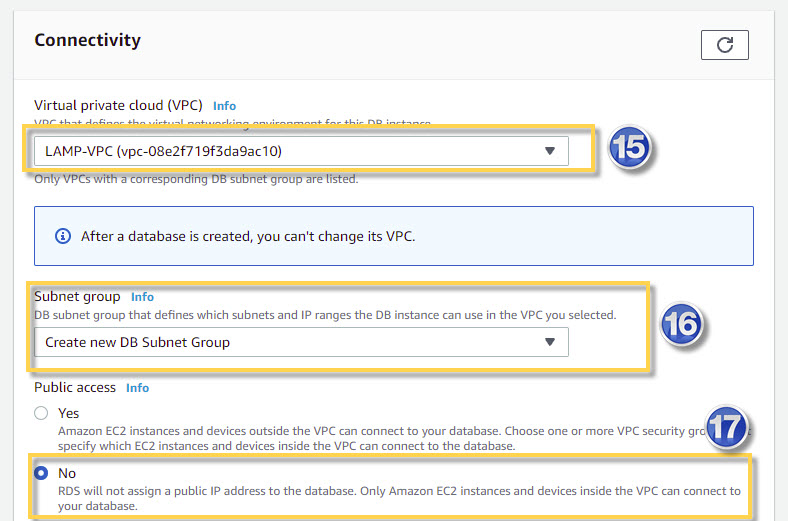
- Select the LAMP-VPC
- No need to select a subnet group
- No need to select subnet groups as are allocated it in the private subnet
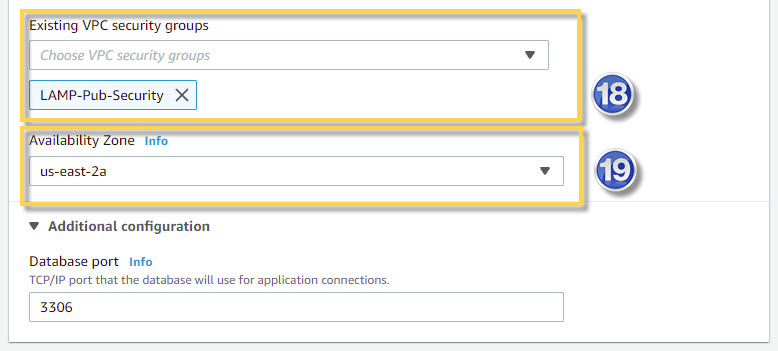
- Select the Security group
- Select an availability zone
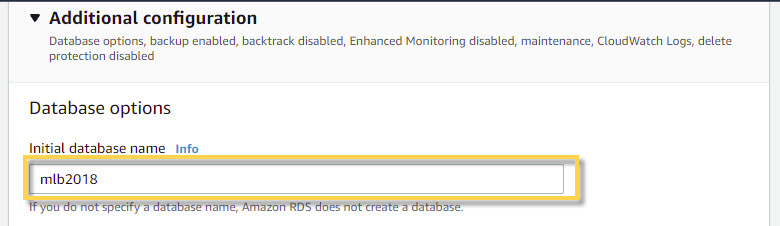
- Assign the LAMP-Project DatabaseName mlb2018
- Click on the Create Database button
After successfully launching the RDS, collect the RDS endpoint URL to login into the RDS and Connect to the application server.
To log in/database import to the RDS Server, you have to install MySQL Client in your Linux terminal. Then import the Project Database into the mlb2018 database
Step-A: Install MySQL Client in any instance Terminal
| $ sudo apt install mysql-client-core-8.0 |
Step-B: Clone the project to get the database
| $ git clone https://github.com/vijaythapa333/phpmultilingualblog.git |
Step-C: install unrar package to unrar the project database
| $ sudo apt install unrar |
Step-D:
Navigate into the newly cloned project directory to unrar the database.
| $ cd phpmultilingualblog/ |
Step-E:unrar the project database to import
| $ sudo unrar e mlb2018.rar |
Step-F: Log in and import the database using the following command.
(mysql -u [DB_UserName] -p -h [RDS-EndPoint-URL] -D [DB_Name] [DB_Name] < mlb2018.sql)
| $ mysql -u blog_user -p -h lamp-db.cio4rlhqebhe.us-east-2.rds.amazonaws.com -D mlb2018 < mlb2018.sql |
Step-08:
Let’s create Instances for LAMP-Application by Auto Scaling.
There are two stages
- Launch Template
- Auto Scaling Group
Create Launch template for Auto Scaling Groups
- Launch Templates from EC2 Dashboard’s side menu.
- Click on Launch Templates
- Click on Create launch template

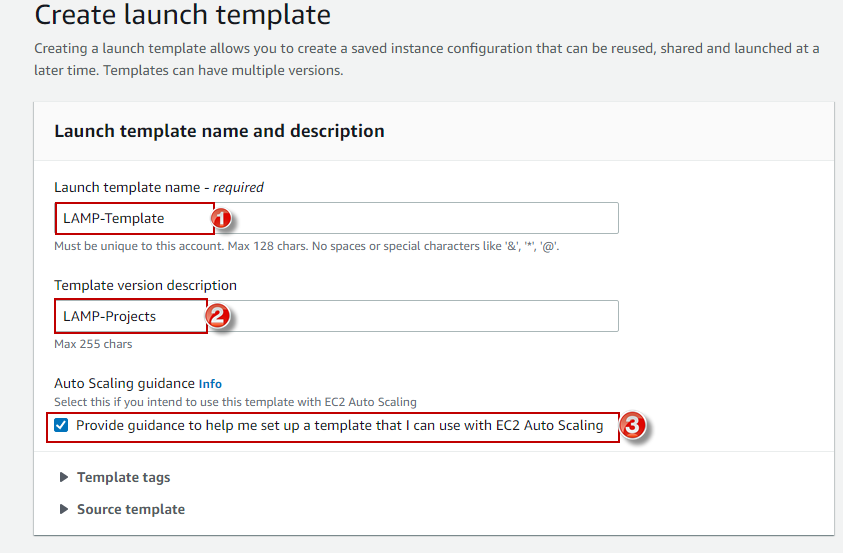
Create launch template’s steps.
- Launch template name: LAMP-Template
- Template version description: LAMP-Projects
- Enable: Auto Scaling guidance
- Select: Ubuntu server 20.04 TLS
- Select Instance type: t2.micro
- Select Key pair name
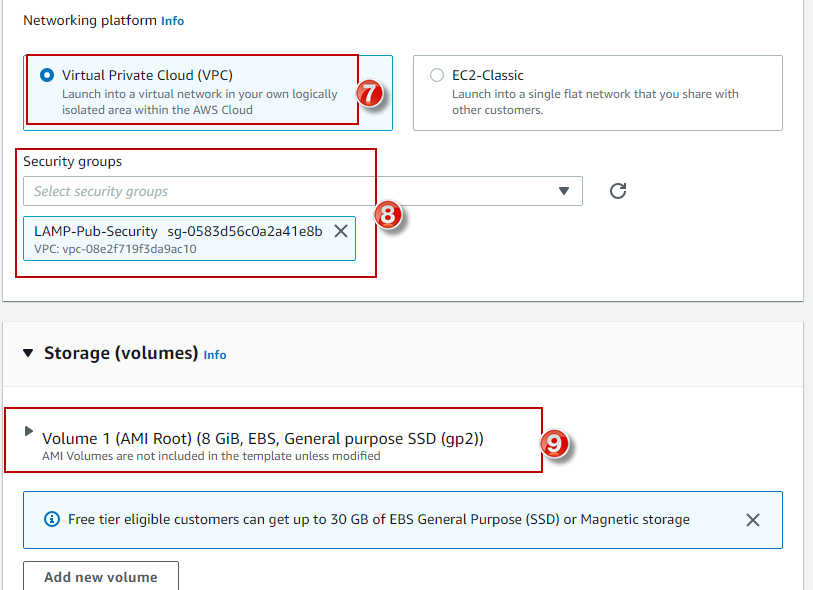
- Select Networking platform
- Select a Security group
- Customize storage (optional)
- Give User data
- Click on Create launch template button

Under Advanced Details
UserData:
| #!/bin/bash sudo apt update sudo apt install -y lamp-server^ git clone https://github.com/vijaythapa333/phpmultilingualblog.git cd phpmultilingualblog/admin/config/ export INSIP=”http://$(curl icanhazip.com)/” export TMPURL=$(echo $INSIP | sed ‘s/\//\\\//g’) export OLDURL=$(echo “http://localhost:8080/phpmultilingualblog/” | sed ‘s/\//\\\//g’) sudo sed -i “s/$OLDURL/$TMPURL/g” constants.php sudo sed -i “s/localhost/DBURL/g” constants.php export PASSWORD=”‘password'” sudo sed -i “s/”/$PASSWORD/g” constants.php sudo sed -i ‘s/root/blog_user/g’ constants.php cat constants.php sudo cp -r ../../. /var/www/html/ sudo rm -rf /var/www/html/index.htmlsudo systemctl restart apache2 |
After successfully creating you’ll get a Success alert. And you can click on View launch templates.launc
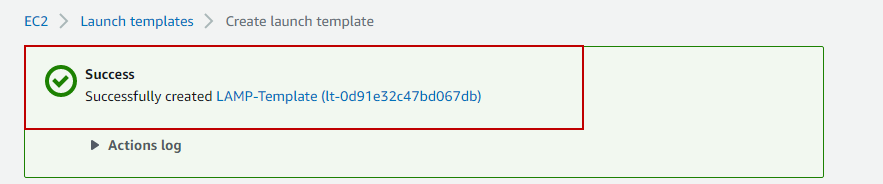
h telat

Create Auto Scaling Groups
An Auto Scaling group contains a collection of Amazon EC2 instances that are treated as a logical grouping for the purposes of automatic scaling and management. … It maintains this number of instances by performing periodic health checks on the instances in the group.
To create an Auto Scaling Group follow the steps below.
Click on Auto Scaling Groups from the EC2 Dashboard menu and then click on Create an Auto Scaling group button.

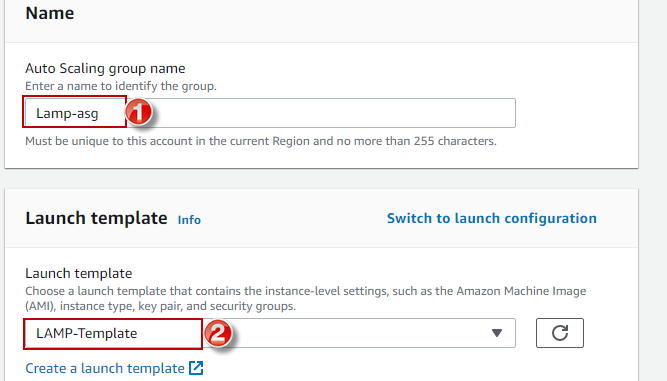
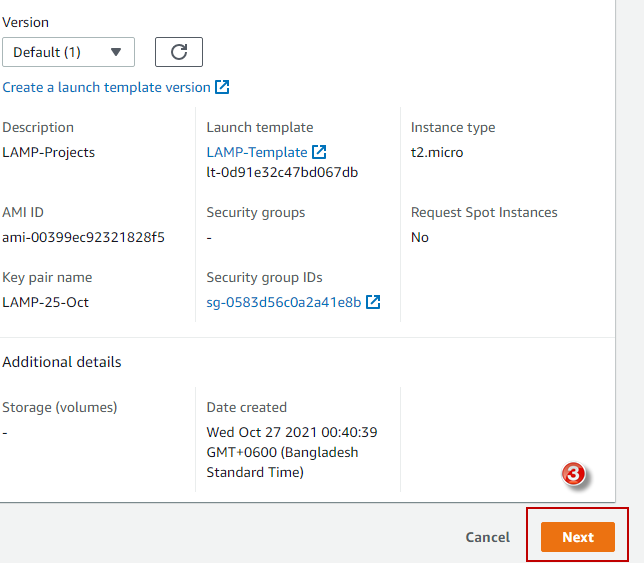
- Step-1: Choose launch template or configuration. Example below,
- Auto Scaling group name: Lamp-asg
- Select a Launch template
- Click on the Next button
tg
Step-2: Configure settings.
1. Instance purchase options: Adhere to launch template
2. Select vpc.
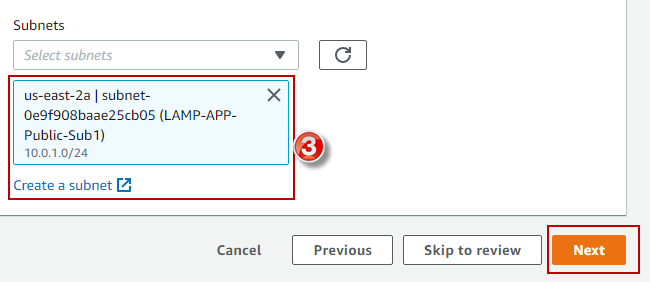
3. Select at least 2 (two) subnet
the purposes of automatic scaling and management. … It maintains this number of inst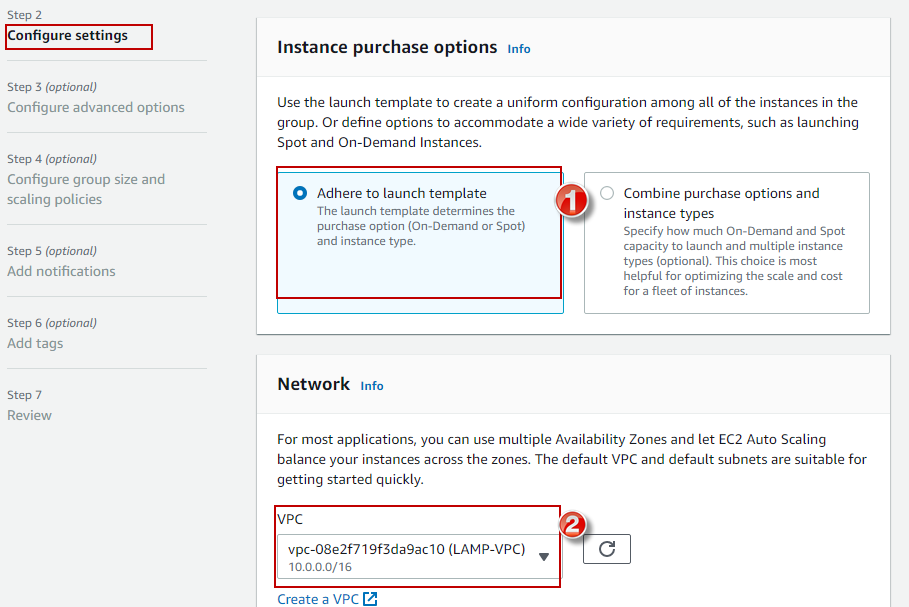
the instances in the group.
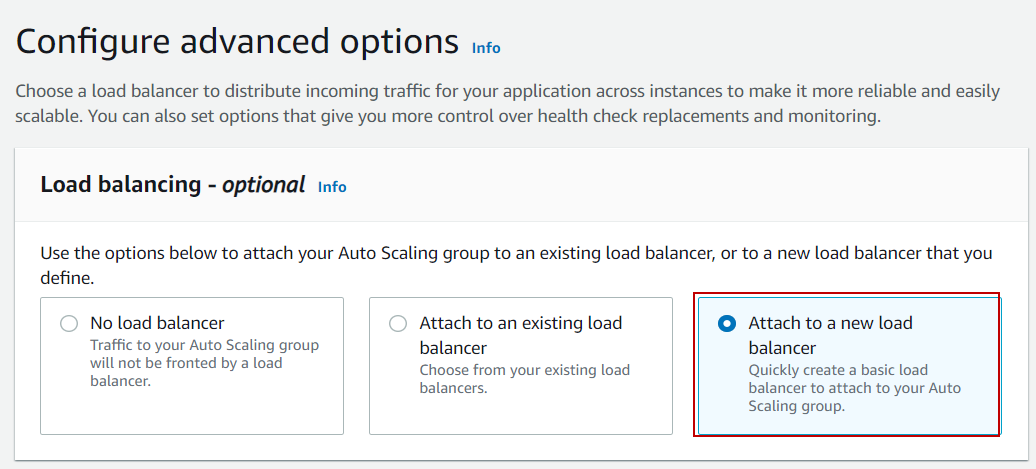
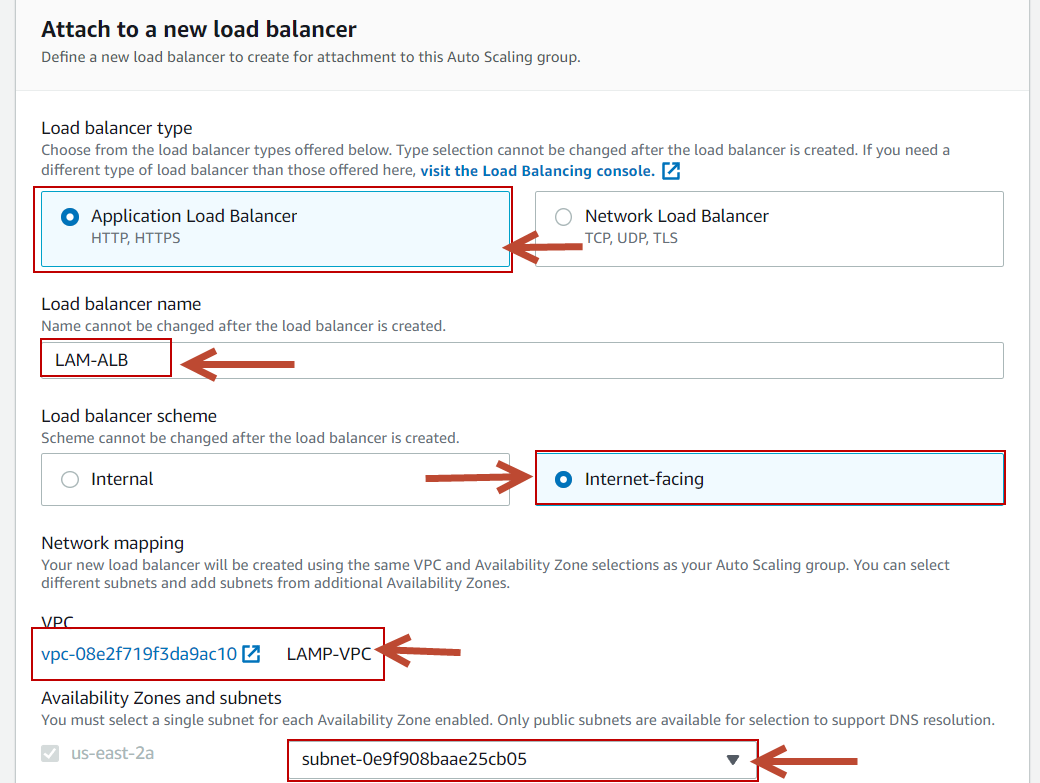
Step-3: Configure advanced options.
- Load balancing: Attach to a new load balancer
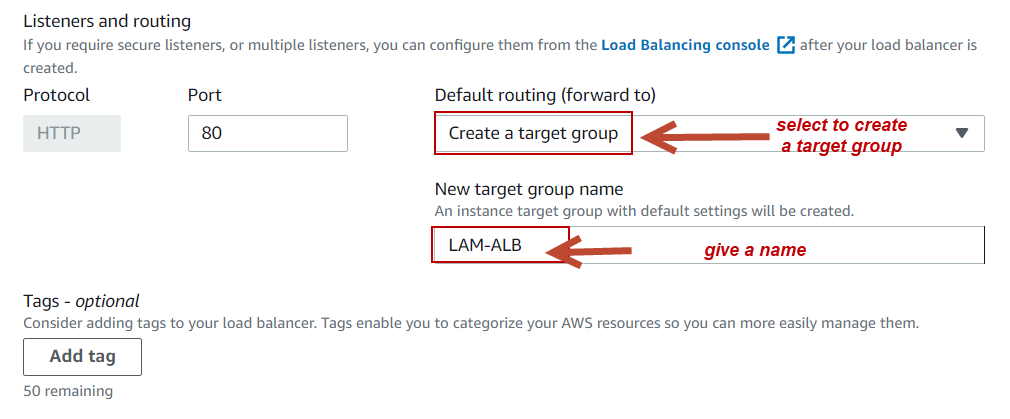
- Load Balancer Name: Give a name.
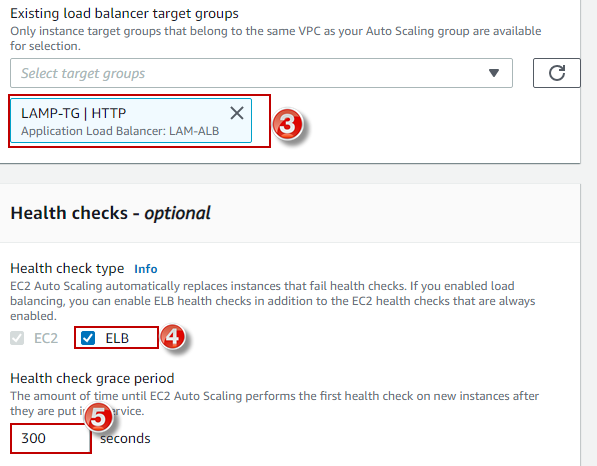
- Health checks: Enable ELB
- Health check grace period: 300 seconds
- Click on Next button
Click on next
ff
f
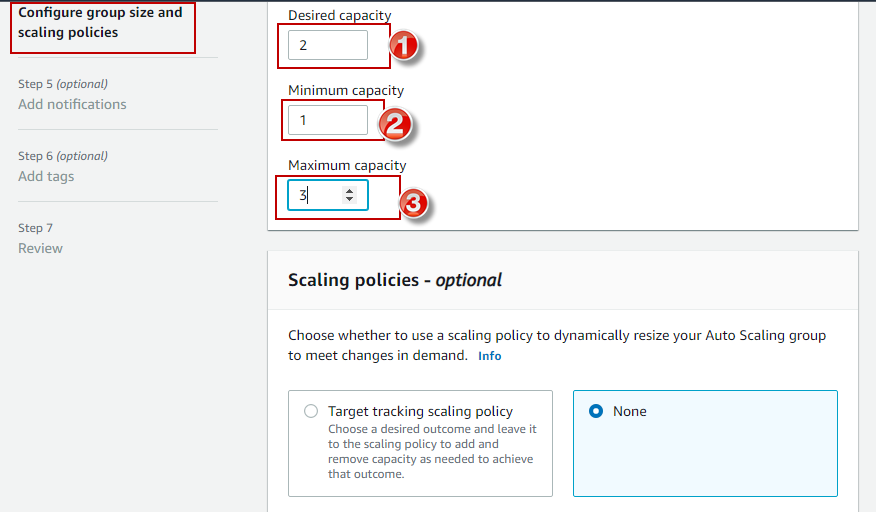
To Configure an Auto Scaling group size and scaling policies follow the steps below.
1. Group size, Desired capacity: 2
2. Minimum capacity: 1
3. Maximum capacity: 3
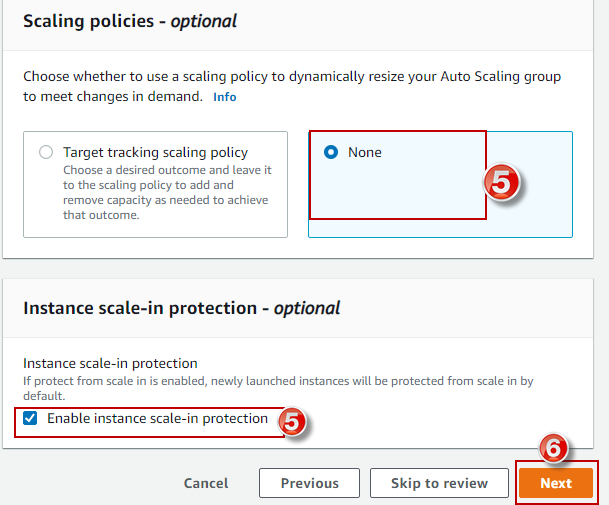
4. Scaling policies: None
5. Enable instance scale-in protection: Enable
6. Click on Next button
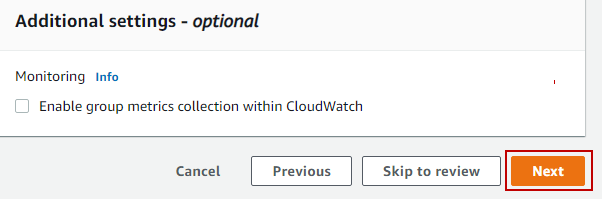
Step-5: Add notifications (Optional), add or Click on Next button.

Step-6: Add Tag(Optional).
1. Key: Name
2. Value: Lamp-asg
3. Click on the Next button

Step-7: Review and click on Create Auto Scaling group
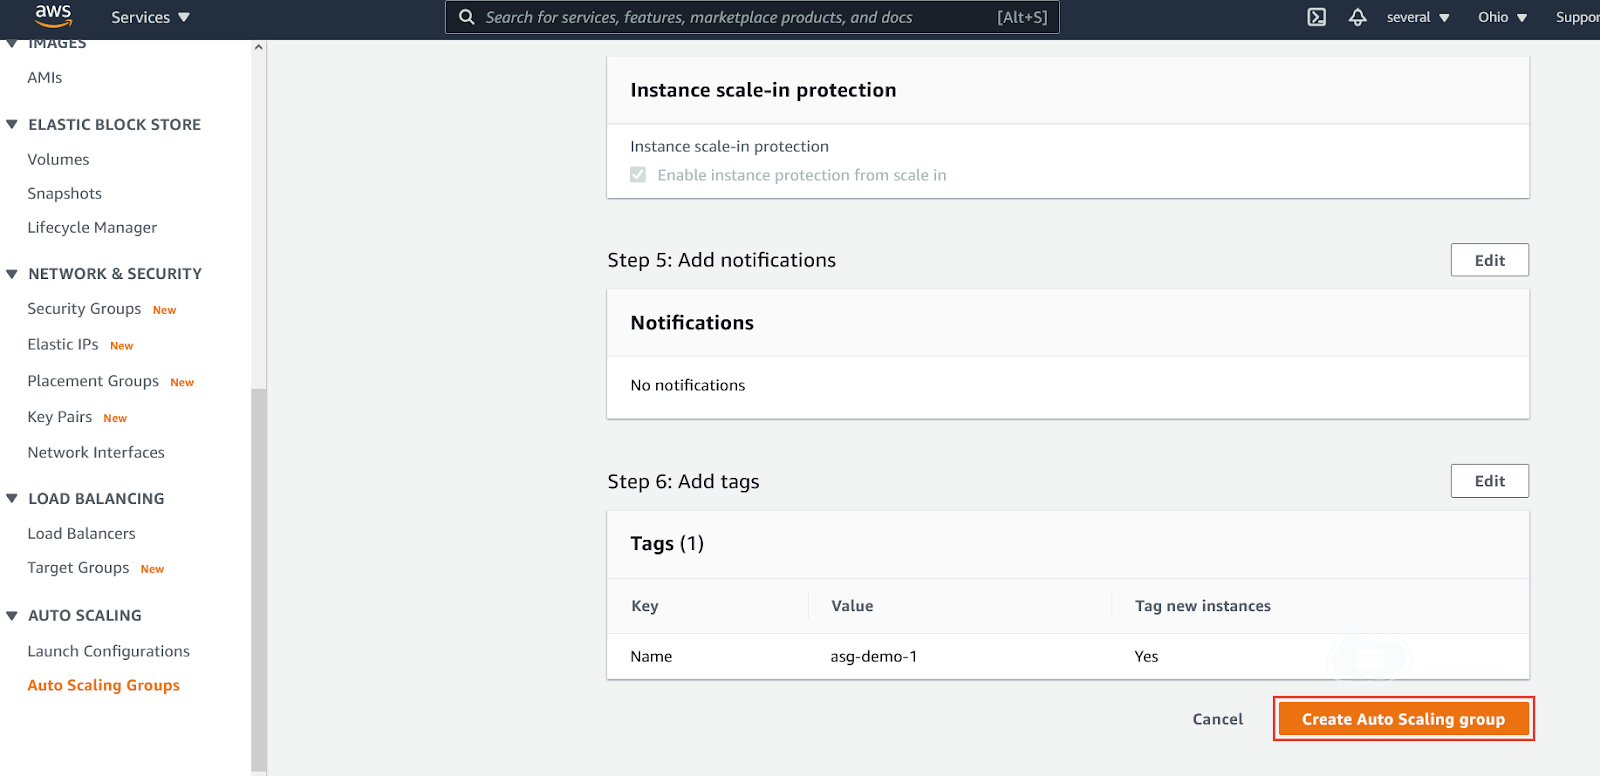
After successfully creating it, you’ll get a success alert.

View Summary
1. Click on Auto Scaling Groups from the EC2 Dashboard side menu.
2. Select targeted Group
3. Select the Activity tab and scroll down to view the summary.

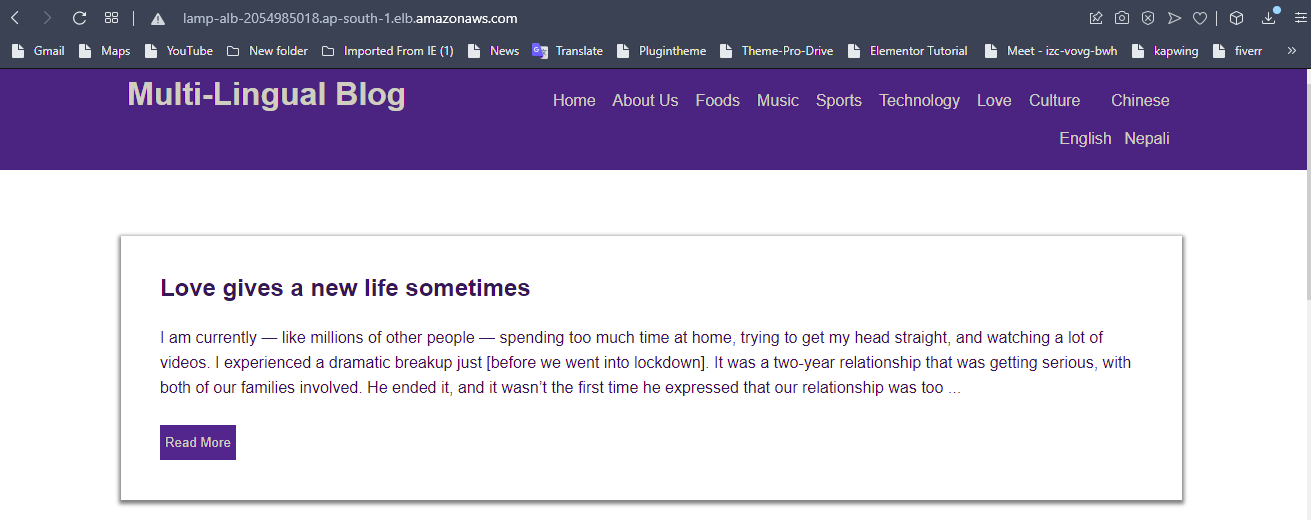
The instance is created with the configurations that we have set, ALB will also be created.
Browse the DNS of LB.
===Tourblshooting on Failur===
Root points to dig down the failure cause:
- Auto Public IP Enable or not
- Subnet, IGW / NAT, and Route associated or not
- Security Group desired traffic allowed or not
- Cloud Instance Log checking on the fly
- Template Userdata checking and version update with re-apply
- Way to Enable Auto-assign Public IP
Select the Subnet > Click on the Action Button > Modify auto-assign IP settings > Enable auto-assign public IPv4 address
- Way to check Subnets, IGW/NAT, and Route association
- Check the IGW to VPC Associated or not
- Check the RouteTables to Subnets Associated or not
- Check the Route to IGW allowed or not
- Way to check security group
- Go to Security group
- Select the newly created Security group which you have created under the VPC
- Check your desired traffic is allowed or not
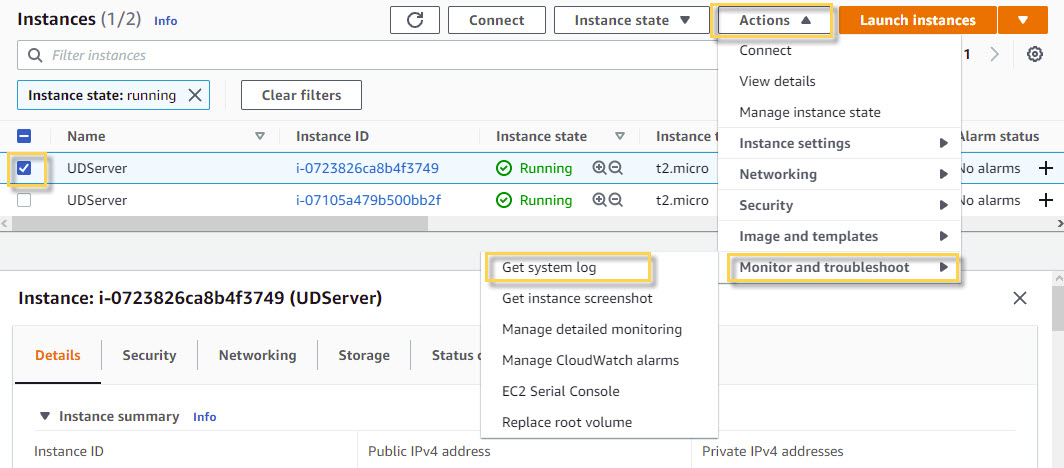
- Way to check running instance log or behavior
There are two ways, one way is from AWS Management Console and another way is to log into the instance terminal.
- Select the desired instance > click on the Action Button > Click on the Monitor and Troubleshoot > Click on the Get System Log
- Log-In into the Instance terminal > cd /var/log > tail -f cloud-init-output.log (to see running installation process)
To see full log > cat cloud-init-output.log
- Way to edit template Userdata checking and version update with re-use
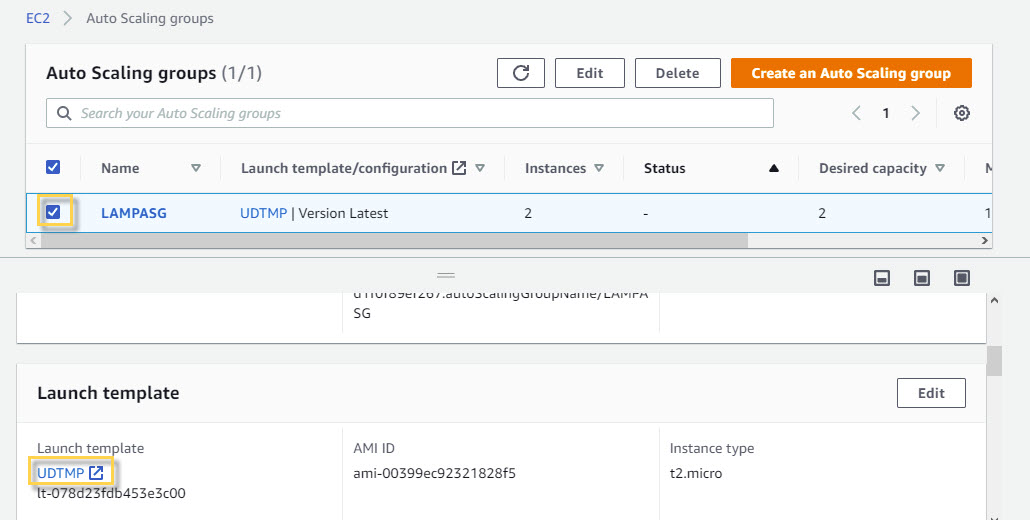
- Go to the auto-scaling group
- Select the auto-scaling group
- Go to Details Tab
- Go to the launch template section
- Click on the template name
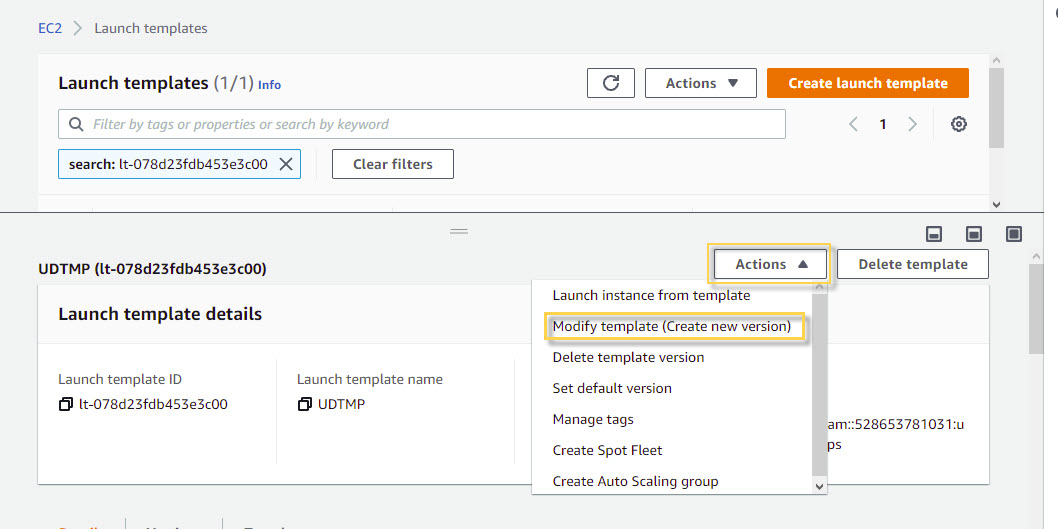
- Again select the template
- Click on the action button
- Click on the modify template(Create new version)
- Assign the new modification version name
- And edit the UserData as per your findings
- Click on the create template version
- Then go back to the autoscaling-management console and click on the Edit button and select the latest template version.
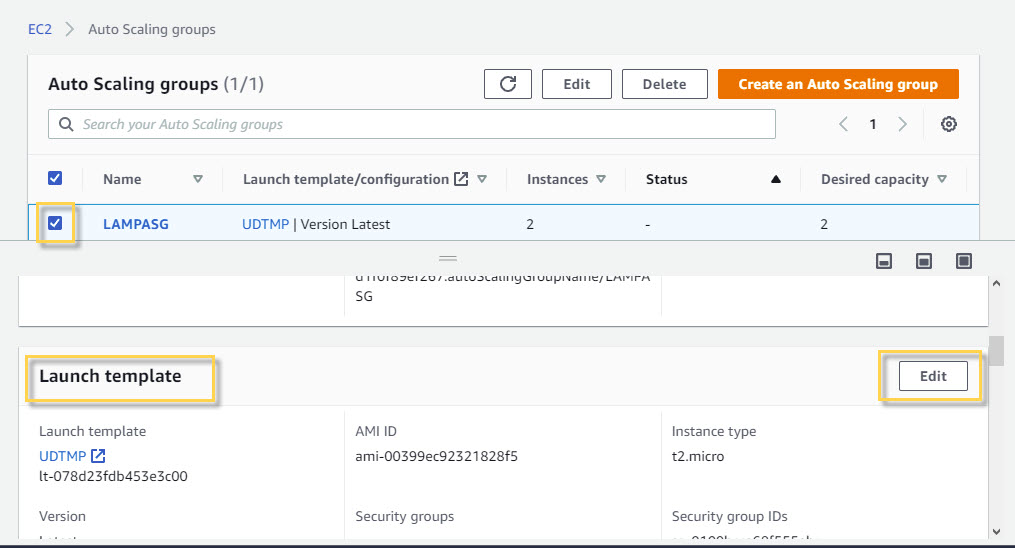
Select the Latest version
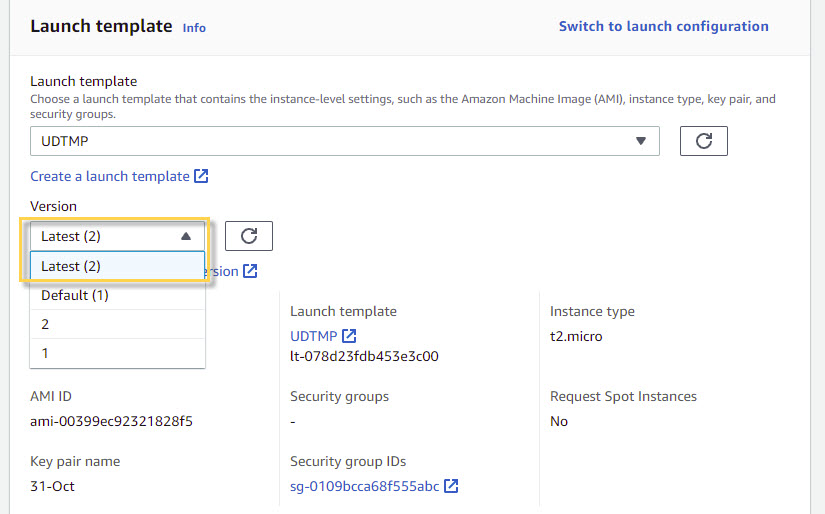
Then click on the update button.
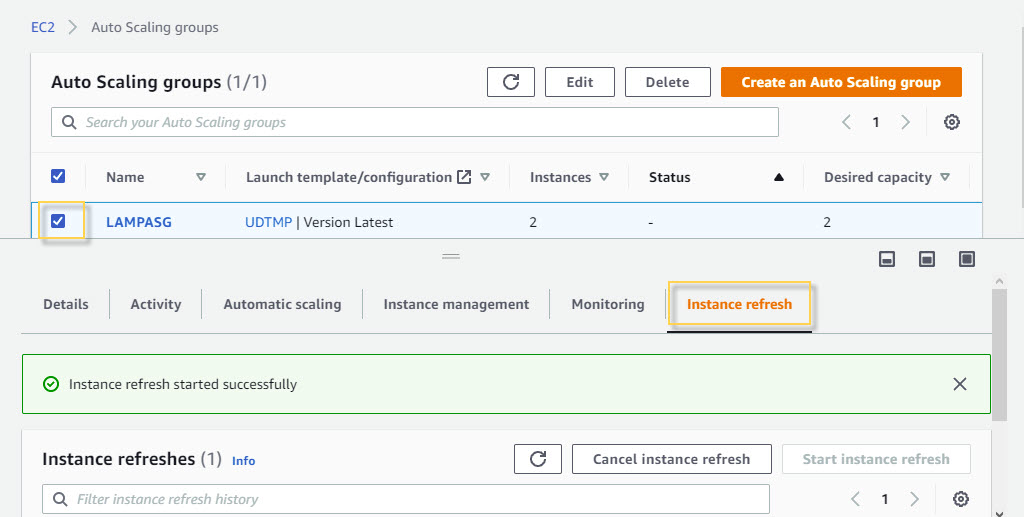
After that, you have to refresh the instance from the following interface.
- Select the Autoscaling group
- Click on the Instance refresh button
- Click on the start button
===THE END===